The different wood engraving techniques to personalize your kuksa
In this article, we will review all the ways to do wood engraving. I'll also give you a short step-by-step guide on how to engrave wood yourself. And, at the end of the article, you'll discover how and where to engrave on a kuksa.
Anne-Laure Compain
Anne-Laure Compain
Nature Lovers
Published on 19 January 2023 (Updated on 31 October 2025)
Summary
1. What is wood engraving?
Wood engraving is considered one of the oldest techniques for printing designs on any type of support. Wood engraving consists of incising designs or illustrations into wood using tools such as a chisel or a knife or substances such as acid. The engraved areas can then be filled with ink to create a print on paper. It is also possible to leave the engraving raw.
This engraving technique was very common for creating illustrations in books or newspapers in the fifteenth and sixteenth centuries. Nowadays, wood engraving is very trendy and is a highly sought-after art.
2. What are the different techniques of wood engraving?
2.1 Hand engraving
Hand engraving is a handcrafted technique that involves engraving an illustration or a design on a wooden block using tools such as a knife or a burin.
The principle is simple: the engraver draws the design to follow on their piece of wood. Then they carve lines into the wood to create the design. Depending on how deeply the wood is carved, this gives the image relief and subtle variations.
The engraving can then remain as is or be covered with ink and pressed onto paper to create a print.
This engraving technique is often considered unique, because, as with any handmade work, it is difficult to have two identical copies.
✅ Advantages of handmade engraving
❌ Disadvantages of hand engraving
Handcrafted art that allows you to create unique and original illustrations or designs.
Requires skill with your hands and precision to create detailed designs.
Allows the creation of original works that have great cultural and artistic value.
Time-consuming and tedious work, especially for large engravings or with very detailed patterns.
Adaptable to all artistic styles and designs.
Expensive, as it requires specific tools and wood.
Allows you to work with wood, which is a noble and natural material that nature provides.
Requires concentration and safety to avoid injuries when using the tools.
In summary, hand wood engraving is a craft technique that allows the creation of unique illustrations and patterns on wooden objects, but it requires a certain level of manual skill and precision to produce detailed designs. It can also be costly and time-consuming, and requires concentration to avoid injury.
2.2 Laser engraving
Laser engraving on wood consists, as the name implies, of using a laser to burn patterns into wood. This type of engraving can be done on many kinds of wood and makes it possible to obtain high-definition results! Indeed, the laser gives us more precise and sharper results than hand engraving and does so in much less time. This allows us to produce many engravings in a shorter period of time.
✅ Benefits of laser engraving
❌ Disadvantages of laser engraving
Accurate and efficient technique that creates high resolution and precision images.
Technique that can be costly as it requires the use of an appropriate machine.
Fast engraving that can be used to produce large quantities of engravings in a short period of time.
Difficult to control the exact results because the engraving depends on the parameters of the machine.
It can be used to engrave images on irregularly shaped objects and delicate materials.
It can damage tools and work surfaces if proper precautions are not taken.
In summary, laser wood engraving is a precise and efficient technique that enables the creation of high-quality images in multiple copies in a short time. However, it is an expensive technique and, depending on the machine's settings, may produce unwanted results and damage the work surface.
Discover our products to engrave!
Add an engraving to your product and order your products with a more personal touch. Our made-to-measure engraving service gives you the opportunity to create unique items.
This wood engraving technique uses acid to erode the wood and thereby create patterns or illustrations on the surface.
First, the engraver uses a tool such as a chisel to draw the pattern to be engraved. Then he covers the area to be engraved with an acid solution, usually acetic acid or nitric acid. The acid then attacks the wood fibers and creates an incised engraving in the wood. Once the pattern is created, the acid is removed from the wood.
It is an old technique that is still used today, although it requires a great deal of experience and caution.
✅ Advantages of acid etching
❌ Disadvantages of acid etching
Ability to create fine, precise detail.
Wood can be damaged if the process is not done correctly.
Ability to create unique textures in engraved areas.
Chemicals used may be hazardous to health and the environment.
Possibility of working on pieces of wood of different sizes and shapes.
Precautions must be taken to protect non-etched areas from acid contamination.
Inexpensive process.
Time consuming and tedious process.
2.4 Engraving with pyrography
Pyrography on wood is a technique that consists of burning the surface of the wood to create patterns and images. For this, a special tool called a pyrography pen is used; it is equipped with a tip heated to a high temperature. The engraver holds this tool like a pen and guides the hot tip over the surface of the wood to burn the fibers and create lines or patterns. Engraving can be done using different tip temperatures to create varying tones and different textural effects.
Pyrography is often used to create designs on wooden objects such as jewelry, knives, boxes, cutting boards, or tableware. This technique is also used to personalize wooden objects or to create industrial markings on wooden materials.
✅ Advantages of pyrography
❌ Disadvantages of pyrography
Technique that creates unique and precise decorative patterns in wood.
Expensive technique as it requires the purchase of a good quality pyrographer.
Adaptable to many artistic styles and patterns.
The final result is not certain because the engraving depends on the human who does it.
Allows you to create patterns using different shades of burn to create different textural effects.
Technique that requires skill to control the different temperatures of the tip and create different etching shades and texture effects.
In summary, engraving with a pyrography tool enables you to work on fine, detailed patterns. However, this technique requires a great deal of precision, experience and patience to achieve the expected result. It is also a fairly costly technique because you need to purchase a good-quality pyrography tool that allows complete freedom to imagine and create.
2.5 Kolrosing
This wood-engraving technique originates from Norway and Sweden, where it was traditionally used to decorate the interiors of wooden houses during the Viking era.
Today this technique is used by many people to decorate everyday wooden objects, particularly wooden tableware.
Kolrosing is an engraving technique that is completely different from other methods because it does not remove material. It consists of making a fine incision in the wood to create fine, regular motifs that often repeat.
A dark powder is then rubbed into the incisions, causing them to darken.
In the past, coal dust or pine-bark sawdust was used. Any type of powder can be used to stain the incisions, such as ground coffee or cinnamon!
Once each incision is filled with colored powder, a protective oil must be applied to prevent the color from coming off and to nourish the wood.
This artisanal technique is often compared to marquetry but differs in that the patterns are carved into the wood rather than glued onto the surface. The Kolrosing technique requires manual dexterity and precision to produce detailed patterns.
✅ Benefits of kolrosing
❌ Disadvantages of kolrosing
A technique that creates unique and colorful decorative patterns in wood.
You have to be very careful not to make incisions in the wrong place.
This technique requires no power tools, only a knife.
Difficult to reproduce two identical patterns.
Adaptable to many wooden supports such as dishes, furniture or instruments.
Difficult to make rounded shapes, at least when you are a beginner!
Durable technique because it allows to preserve wooden objects while decorating them.
Very long and meticulous technique depending on the support and the symbols to be made.
In short, this engraving technique is the most traditional for Scandinavian products like kuksa. It is inexpensive because it does not require any special tools other than a knife. It is also better for your health because you can do it out in the forest if you wish! You will not breathe any smoke from a pyrography tool. Unfortunately, as with anything made by hand, it is a time-consuming technique and does not allow designs to be reproduced identically.
Last but not least, kolrosing is a natural technique; you won't need electricity or acid! The powders that you put into the incisions in the wood are coffee, charcoal, or cinnamon.
Are you interested in the world of wood? 🌳
Discover the incredible versatility of wood through various species and the world of woodworking. By subscribing, you'll receive information on wood and wood species once a week.
3. What types of wood can be engraved on?
There are many types of wood that can be used for engraving, each with its own advantages and disadvantages. Before detailing which wood is worth using, you need to know the difference between softwoods and hardwoods.
Softwoods are easy to grow because they grow quickly. They are also easy to work with and less expensive than hardwoods. Because of their rapid growth, softwoods are saturated with moisture and resin, like conifers and some deciduous trees. It is this moisture that makes the wood fibers softer.
However, care must be taken with softwoods as they are less resistant and durable than hardwoods.
Examples of softwoods:
Fir
Pine
Cedar
Willow
Poplar
Birch
Chestnut
Cherry
Now let's talk about hardwoods! Hardwood trees are older and stronger than softwood trees. Hardwoods grow quite slowly, resulting in a wood with a lot of density and often with few knots.
Examples of hardwoods:
Oak
Maple
Eucalyptus
Ash
Beech
The most commonly used woods for engraving
Wood
Description
Birch
This is a soft, white, uniform wood that is easy to work with. It is ideal for beginners as it is easy to engrave and gives good results.
Cedar
This is a reddish wood that is easy to carve and gives good results. It is also weather resistant, making it a good choice for outdoor projects.
Walnut
This is a hard, dense wood that is more difficult to work with than birch or cedar. However, it produces very detailed results.
Oak
This is a hard, dense and heavy wood that is more difficult to carve than birch or cedar. It is ideal for more advanced projects.
Driftwood
This is reclaimed wood that has been soaked in water and given a unique shape. It is often used for original and unique printmaking projects.
Reindeer antlers
Reindeer antlers are hard and dense. They are easy to engrave and give good results, and have a unique texture.
Case Study:
Choosing your wood for pyrography
When doing pyrography on wood, remember to use a light-colored wood, otherwise you may not be able to see the engraving.
Softwoods are perfect for pyrography because of their light color. But you should also be aware that they are more fragile than hardwoods and do not withstand high temperatures. Therefore, you should lower the power of the pyrography tool before working on a soft wood such as pine, cedar or poplar.
Birch remains a top choice for pyrography because it has a pale white hue and because it is a soft wood with a uniform grain. The pyrography tool will "glide" over the wood and produce an even line. But, as with any other engraving technique, you should first prepare the wood by sanding it.
Be careful not to use treated or varnished wood; they may release chemical substances when the pyrography tool passes over them.
What criteria should be considered when choosing wood for engraving?
It is important to note that each type of wood has its own unique properties and characteristics, so it may be useful to test different types of wood before choosing the one that best suits your project.
Hardness and aging
Some woods are harder than others and therefore better withstand the passage of engraving tools. Other woods can move or deform over time, so it is important to choose a stable wood to prevent the engraving from becoming distorted or illegible.
Color
The color of the wood can also be important for your project. Some woods have natural hues that will enhance the engraving, while others may be too dark. You should think about the final result before you begin, so you can choose the right wood.
Availability
Some wood species are easier to find than others (for example, pine wood compared to exotic wood). As with kuksas, birch burl is harvested only during a short period of the year. Outside this period, it is a very difficult wood to find.
Resin content
Resin comes from the sap of trees and protects them from diseases and insects. For example, a high resin content will result in a more burned, darker engraving. Low resin content wood includes apple, ash, walnut, locust and oak.
Durability
Some woods are more resistant than others to moisture, insects or mildew. It is therefore important to know how a wood will age before you start. Otherwise, you will need to protect it with natural oils more often than expected.
Cost
Cost can also be a factor when choosing; some woods are more expensive than others (depending on their origin, species, rarity, etc.). As mentioned above, softwoods grow faster and will be less expensive than hardwoods.
Ecology
The ecological aspect should also be taken into account. Some people prefer to work with reclaimed wood from responsibly managed forests. For example, for kuksas we use burls, a growth of the tree that does not require any felling.
Hardness
Some woods are harder than others and are more resistant to the wear of engraving tools. Walnut, cherry, ash and oak are considered hardwoods and are suitable for hand or laser engraving.
5. Wooden printing block: steps to create one from scratch
Depending on what you want to do, not all steps are mandatory!
This example will explain how to create a wooden printing block.
But if you want to carve a kuksa, steps 1, 2, 3 and 5 are the same! The only change is how you carve.
To carve into a wooden object, follow the lines of your design and cut along them. Use a gouge or a knife and start cutting gradually. Remove the wood layer by layer and work on the whole pattern; don't focus on a single part, otherwise your carving will not be uniform.
Also, and only if your carving is not intended for printing, apply oil. The oil will help protect the wood and harden it. It will also enhance your carving! I recommend using linseed oil to oil your wood surface.
Step 1: Choose your technique and wood
For this first step, you must focus on the desired final result in order to choose the appropriate technique and wood.
To begin, it is best to start with hand engraving tools. Namely engraving knives, chisels and gouges. These are tools that can be found in any hardware store and are affordable. At the beginning, you don't need to have the best tools; start with basic and simple tools and then, depending on your experience, you will buy better quality tools.
As for the wood, start with soft, easy-to-carve woods like birch, cedar, pine or fir.
Step 2: Prepare your work surface
Before you begin, make sure your object or piece of wood is held securely. Use a vise to hold your wood, so your work surface will be stable and you won't risk making an accidental movement.
Also remember to sand your surface if necessary and especially to remove any dirt or dust.
Finally, set up good lighting where you work — your work will be all the cleaner for it!
Step 3: Draw the design to be engraved
For the more adventurous, draw your design directly onto the wood with a pencil or a fine point.
If you don't feel ready to draw your design directly on the wood, you can sketch it in charcoal on paper. Complete your whole design and use hatching, for example, to identify the areas to be carved out. Once your drawing is finished on the paper, you can transfer it to the wood. To do this, place your sheet with the drawn side against the wood. You will then see your design appear on the wood. If the design is not visible enough, you can go over it with a pencil.
Be careful: make sure to center and align your design relative to your work surface!
Step 4: Start engraving
For this type of example you should carve out the light areas of the drawing, that is, the parts where you did not draw. Indeed, for the printing process to work, the area you want to print must be raised and not carved into the wood.
With your gouges, you will carve all around the charcoal lines. Depending on how you hold the gouges and the pressure you apply, the result will be different.
Tip: Hold the gouge in the hollow of your palm and hold the wood block with your other hand. You must always work in the same direction, it is your wood block that turns and not your hand! You don't need to carve very deeply for your print to work, so go slowly. Finally, always keep a small angle between your gouge and the wood; this produces a more precise result.
Step 5: Take breaks
This may seem like an unnecessary step, but it is essential! Breaks allow you to rest your muscles and your eyes, but above all to check your work. It is by looking up from your work that you notice any mistakes and can quickly correct them.
Step 6: Prepare the inking
Before applying the ink to the wood, scrub the wood with a brush to remove dust and any remaining pieces of wood.
Also, I recommend sanding your surface very lightly to ensure the work is smooth and that the ink will not smudge.
Step 7: Apply the ink
Once the surface of the wood is clean and smooth, you must apply the ink to the wood.
On a glass or Plexiglas plate, place a small amount of ink; this is your ink reserve. Then, using an ink roller, spread the ink in a thin layer on your glass or Plexiglas by lifting the roller at each pass.
The ink will be sticky and a slight hissing sound will be heard. If you don't hear it, you have too much ink!
With your roller, roll over the wood evenly, making sure not to forget the corners!
Step 8: Print the design on a surface
Take a sheet of paper and place it on your inked wooden surface. I suggest you use Japanese paper (thin paper). But if you want to use thick paper, it is also possible. You just have to remember to moisten it beforehand so that the fibres soften and the ink holds better.
To avoid smudging when you lay your paper, I suggest you start from a corner. Place your paper on the top left corner and press down with your thumb. Then lay the rest of the paper.
Use a small spoon to work each area of the paper, pressing hard and going over each area several times.
Once your print is made, it’s time to examine it closely and see if you need to make any changes to your wooden matrix. Once the final result is satisfactory, you can print as many times as you want using your matrix.
Step 9: Drying
Drying time varies depending on the ink you use, so I'll let you read the instructions for your ink.
6. What tools are needed for hand wood engraving?
Today there are many tools for wood engraving available at a range of prices, making it possible for anyone to take up engraving. Because there are so many tools, each one has a specific purpose.
Tools
Description and use
Gouges
Designed to cut grooves without the corners of the tool digging into the wood. They quickly remove excess wood from a flat wooden surface. They can also be used to cut precise grooves and trenches.
This is the most important tool for carving.
Carving Knife
Similar to the gouge but complementary! It is used to carve fine, straight lines in wood. To start, choose a knife with a blade between 3 and 5 cm, you will have more control over your blade if it is small.
For narrow areas, use a detail knife (blade less than 2cm).
Rifler
Perfect for finishing in hollows and bumps, the riffler is a rasp with small teeth. It is used for shaping, smoothing shapes or leveling surfaces, polishing and flattening wood.
Chisel
The chisel is a steel bar with a triangular, square or rhombic (diamond-shaped) form. Depending on the chisel used, the groove in the wood will be fine or wide, which is why it is interesting to have several.
The square chisel is perfect for making wide, shallow carvings in wood.
Hand saw
The saw is used to prepare the work area or to cut large areas in the wood.
File
After cutting a shape, with the saw for example, the file will be used to smooth and polish the edges of the wood.
Sander
Perfect at the end of carving, the sander will remove splinters and smooth the wood.
Pencil and templates
A grease pencil or charcoal is the most commonly used to trace the pattern to be carved on the wood.
7. Engraving on a kuksa, what are the best places to engrave?
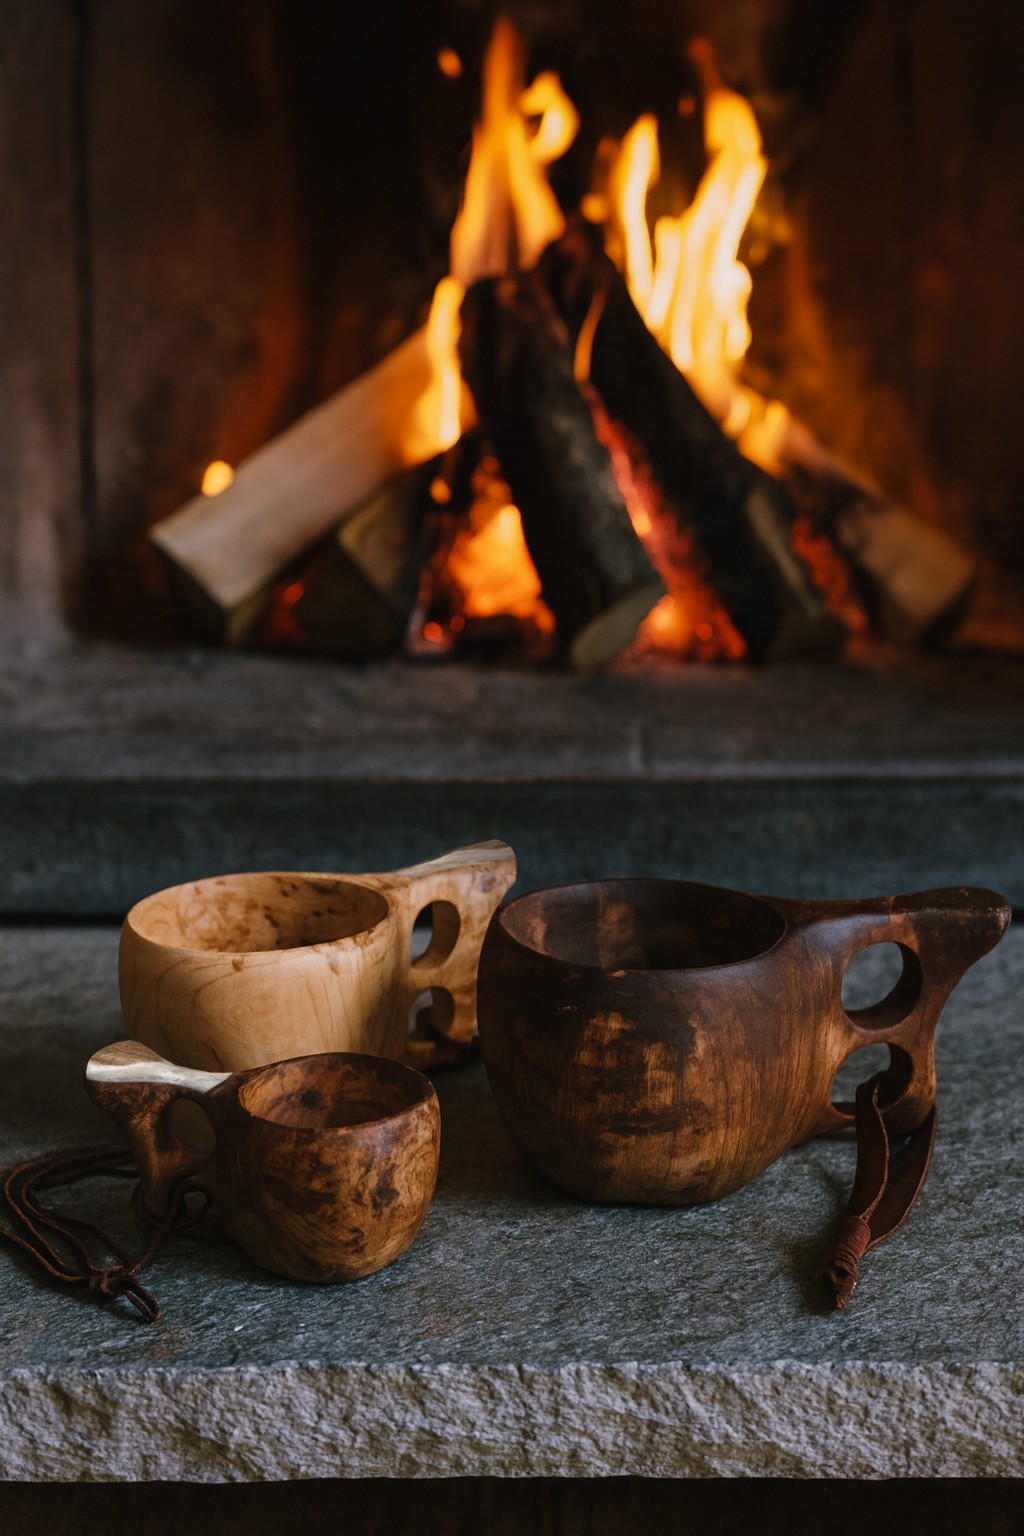
First of all, let's quickly review what a kuksa is! It is a traditional wooden cup emblematic of the Scandinavian peoples, a hand-carved cup made from birch burl. The kuksa was invented by the Sami people, an indigenous people living in northern Europe, and was used by them for drinking and eating.
Regarding engraving on a kuksa, you can do it everywhere! Although some places are more appropriate. Here are the best places to engrave on a kuksa:
The top of the handle
The outside of the kuksa
The bottom of the kuksa
Regarding technique, kolrosing is, to me, the most beautiful engraving technique for a kuksa, as it remains a traditional Scandinavian art, but hand engraving is also very good.
Before you start engraving a kuksa, study the traditional engravings and their meanings—some of them could inspire you!
8. Engraving reindeer antler to decorate a kuksa
Here, I'm going to explain how to engrave reindeer antler using the kolrosing technique! First of all, you need to make sure that your reindeer antler is clean. Then, to make the task easier, you can boil the reindeer antler for a few minutes in hot water to soften it, but it is not mandatory.
If your reindeer antler is already attached to a kuksa, don't boil it — you risk damaging the kuksa!
To begin, draw in pencil the design you want to engrave on the reindeer antler. If you're a beginner, I recommend starting with straight lines, as this will make things easier later on.
Once your drawing is finished, take a fine, sharp gouge and begin carving the reindeer antler.
If you need to make straight lines, you should push your gouge, while for curves you should pull it toward you.
Once your engraving is finished, add pigments so they penetrate the grooves you created while carving. Rub the colored pigments into your engraving, then wipe off the excess with a cloth. Pigments can be natural, such as charcoal, cinnamon, or coffee. You can also use colored powders that you can buy at a hardware store.
Christmas Game, win wooden kuksa cups
Experience an authentic and traditional Christmas with our giveaway! Try your luck to win one of our handmade wooden kuksa cups, specially selected to brighten your holidays.
For Christmas, try to win one of our 3 favorite kuksa. A handmade wooden mug to celebrate the festive season. 🎄
To enter, add your email address below
Contest results on December 21. 🍀
Cookies
We and selected third parties use cookies or similar technologies for technical purposes and, with your consent, for experience, measurement and marketing.